Overview
This tutorial walks you through creating and launching your first phishing simulation campaign in GoPhish. You'll learn how to set up target groups, design email templates, configure landing pages, launch the campaign, and analyze the results to improve your organization's security awareness.
Prerequisites
- GoPhish Cloud instance deployed (see AWS or Azure deployment tutorials)
- Admin access to GoPhish dashboard
- SMTP server configured for email delivery
- List of target email addresses
What You'll Learn
- Create and manage user groups for targeting
- Design effective email templates
- Configure realistic landing pages
- Launch and schedule campaigns
- Analyze results and generate reports
- Use the GoPhish API for automation
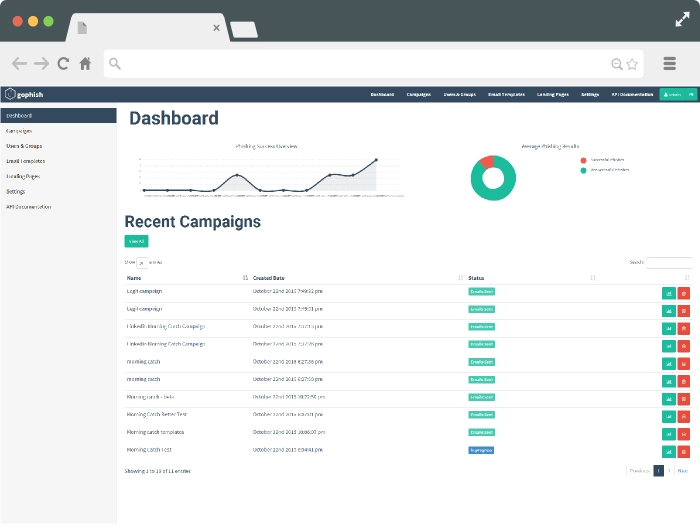
GoPhish Dashboard - Campaign Overview
Step 1: Create a User Group
User groups define your campaign targets. You can import users from CSV files or add them manually. Each user should have a valid email address and optional metadata like first name, last name, and position.
Via Dashboard
- Navigate to "Users & Groups" in the left sidebar
- Click "New Group" button
- Enter group name (e.g., "Marketing Team" or "Q1 2025 Test")
- Add users manually or import from CSV
- Click "Save" to create the group
# CSV format for bulk import
First Name,Last Name,Email,Position
John,Doe,john.doe@company.com,Marketing Manager
Jane,Smith,jane.smith@company.com,Sales Rep
Robert,Johnson,robert.j@company.com,Developer
Or use the API to create groups programmatically:
POST /api/groups/
Authorization: Bearer YOUR_API_KEY
Content-Type: application/json

{
  "name": "Marketing Team",
  "targets": [
    {
      "first_name": "John",
      "last_name": "Doe",
      "email": "john.doe@company.com",
      "position": "Marketing Manager"
    },
    {
      "first_name": "Jane",
      "last_name": "Smith",
      "email": "jane.smith@company.com",
      "position": "Sales Rep"
    }
  ]
}
Step 2: Design an Email Template
Email templates define the phishing message your targets will receive. Use realistic content that mimics legitimate corporate communications while incorporating tracking elements.
Template Variables
GoPhish supports dynamic variables to personalize emails:
| Variable | Description | Example |
|---|---|---|
{{.FirstName}} |
Recipient's first name | John |
{{.LastName}} |
Recipient's last name | Doe |
{{.Email}} |
Recipient's email | john.doe@company.com |
{{.Position}} |
Job title/position | Marketing Manager |
{{.URL}} |
Tracking link to landing page | https://gophish.company.com/?rid=abc123 |
{{.TrackingURL}} |
Transparent tracking pixel | Auto-inserted by GoPhish |
<!-- Example Email Template -->
<html>
<head>
  <style>
    body { font-family: Arial, sans-serif; color: #333; }
    .header { background: #0078d4; color: white; padding: 20px; }
    .content { padding: 20px; }
    .button { background: #0078d4; color: white; padding: 12px 24px;
              text-decoration: none; border-radius: 4px; }
  </style>
</head>
<body>
  <div class="header">
    <h2>IT Security Alert</h2>
  </div>
  <div class="content">
    <p>Dear {{.FirstName}},</p>
    <p>We've detected unusual activity on your account. For security purposes,
       please verify your credentials within 24 hours.</p>
    <p>
      <a href="{{.URL}}" class="button">Verify Account</a>
    </p>
    <p>If you did not request this, please contact IT immediately.</p>
    <p>Best regards,<br>IT Security Team</p>
  </div>
</body>
</html>
Save the template with a descriptive name like "Password Reset - Generic" for easy reference in future campaigns.
Step 3: Configure a Landing Page
Landing pages are what users see after clicking the phishing link. They can capture credentials (for training) or simply display an awareness message.
Landing Page Options
- Capture Credentials: Collect username/password for realistic simulation
- Capture Data: Collect other form data (credit cards, SSN, etc.)
- Redirect: Automatically redirect to a training page after submission
- Import Site: Clone an existing website for realistic appearance
<!-- Example Landing Page -->
<html>
<head>
  <title>Account Verification</title>
  <style>
    body { font-family: Arial, sans-serif; max-width: 500px;
           margin: 50px auto; padding: 20px; }
    .form-group { margin-bottom: 15px; }
    input { width: 100%; padding: 10px; border: 1px solid #ddd;
            border-radius: 4px; }
    button { background: #0078d4; color: white; padding: 12px 24px;
             border: none; border-radius: 4px; cursor: pointer; }
  </style>
</head>
<body>
  <h2>Verify Your Account</h2>
  <form method="POST">
    <div class="form-group">
      <label>Email Address</label>
      <input type="email" name="email" required>
    </div>
    <div class="form-group">
      <label>Password</label>
      <input type="password" name="password" required>
    </div>
    <button type="submit">Verify Account</button>
  </form>
</body>
</html>
Important: All captured data is stored securely in GoPhish and should be handled according to your organization's privacy policies. Never use real credentials for testing.
Step 4: Set Up Sending Profile (SMTP)
Configure your SMTP server to send phishing emails. This can be Amazon SES, SendGrid, or your organization's mail server.
POST /api/smtp/
Authorization: Bearer YOUR_API_KEY

{
  "name": "AWS SES - Production",
  "host": "email-smtp.us-east-1.amazonaws.com:587",
  "username": "AKIAIOSFODNN7EXAMPLE",
  "password": "wJalrXUtnFEMI/K7MDENG/bPxRfiCYEXAMPLEKEY",
  "from_address": "security@company.com",
  "ignore_cert_errors": false
}
See our SMTP Configuration Tutorial for detailed setup instructions.
Step 5: Launch Your Campaign
Now that you've configured all components, you're ready to launch your campaign. You can send immediately or schedule for a specific date and time.
Via Dashboard
- Navigate to "Campaigns" in the left sidebar
- Click "New Campaign"
- Enter campaign name and select email template
- Select landing page and sending profile
- Choose target groups
- Set launch date/time (or send immediately)
- Click "Launch Campaign"
POST /api/campaigns/
Authorization: Bearer YOUR_API_KEY

{
  "name": "Q1 2025 Security Awareness Test",
  "template": {
    "name": "Password Reset - Generic"
  },
  "page": {
    "name": "Credential Capture Page"
  },
  "smtp": {
    "name": "AWS SES - Production"
  },
  "url": "https://gophish.company.com",
  "launch_date": "2025-01-15T09:00:00Z",
  "send_by_date": "2025-01-15T17:00:00Z",
  "groups": [
    {
      "name": "Marketing Team"
    }
  ]
}
Step 6: Monitor Campaign Progress
Track your campaign in real-time from the dashboard. GoPhish provides detailed metrics on each interaction.
Campaign Metrics
| Metric | Description | Significance |
|---|---|---|
| Emails Sent | Total emails delivered | Campaign reach |
| Emails Opened | Recipients who opened email | Engagement rate |
| Clicked Link | Users who clicked phishing link | Vulnerability indicator |
| Submitted Data | Users who entered credentials | Critical security risk |
| Email Reported | Users who reported as phishing | Positive security behavior |
# Get campaign results via API
GET /api/campaigns/123/results
Authorization: Bearer YOUR_API_KEY

# Response includes timeline of events
{
  "id": 123,
  "name": "Q1 2025 Security Awareness Test",
  "status": "Completed",
  "results": [
    {
      "email": "john.doe@company.com",
      "status": "Submitted Data",
      "send_date": "2025-01-15T09:00:00Z",
      "reported": false
    }
  ],
  "stats": {
    "sent": 50,
    "opened": 42,
    "clicked": 18,
    "submitted_data": 8,
    "email_reported": 3
  }
}
Step 7: Analyze Results and Generate Reports
After your campaign completes, analyze the results to identify training opportunities and generate reports for stakeholders.
Key Analysis Points
- Click-through rate: Percentage of users who clicked the link (target: <10%)
- Data submission rate: Percentage who entered credentials (target: <5%)
- Reporting rate: Percentage who reported the email (target: >50%)
- Time to click: How quickly users fell for the phish (indicates urgency effectiveness)
- Department breakdown: Which teams need additional training
# Export campaign report
GET /api/campaigns/123/summary
Authorization: Bearer YOUR_API_KEY

# Download as CSV or PDF
GET /api/campaigns/123/export?format=csv
GET /api/campaigns/123/export?format=pdf
Follow-up Actions
- Send awareness training to users who clicked or submitted data
- Recognize and reward users who reported the phishing email
- Schedule follow-up campaigns with increased difficulty
- Share aggregate results with leadership (anonymized)
- Update security policies based on findings
Best Practices
Tips for Effective Campaigns
- Start with moderate difficulty - don't make it too easy or impossibly hard
- Use realistic scenarios relevant to your industry and organization
- Schedule campaigns during business hours for best engagement
- Avoid sending around major holidays or busy periods
- Provide immediate feedback when users click or submit data
- Never punish employees for falling for phishing - focus on education
- Run campaigns quarterly to track improvement over time
- Test your templates and landing pages before launching
Troubleshooting
Common Issues
Emails Not Sending:
- Verify SMTP credentials and connection settings
- Check SMTP server logs for authentication errors
- Ensure sending domain has proper SPF/DKIM records
- Verify SES/SendGrid account is not in sandbox mode
Emails Going to Spam:
- Configure SPF, DKIM, and DMARC DNS records
- Warm up your sending domain gradually
- Avoid spam trigger words in subject lines
- Use a reputable SMTP provider
Low Open Rates:
- Some email clients block tracking pixels
- Improve subject line to increase opens
- Send from a trusted internal address
- Check if emails are being quarantined
Next Steps
Email Template Best Practices
Learn how to design effective templates that test awareness while maintaining ethics.
View Tutorial →Configure SMTP
Set up reliable email delivery with AWS SES, SendGrid, or custom SMTP.
View Tutorial →Need Help?
If you encounter issues with your campaign, our support team is here to help.
Contact Support