Deploy GoPhish Cloud on Azure
Launch a fully-configured GoPhish Cloud instance on Azure in under 5 minutes using ARM templates. Powered by GoPhish.
Overview
This tutorial guides you through deploying GoPhish Cloud on Microsoft Azure using our pre-built ARM (Azure Resource Manager) template. The deployment creates all necessary resources including VMs, networking, and managed databases.
Prerequisites
- Azure Subscription with Contributor access
- Basic understanding of Azure Resource Groups
- Azure CLI installed (optional)
What You'll Get
- Azure VM running GoPhish (Standard_B2s recommended)
- Network Security Group configured for HTTPS and admin access
- Public IP address for external connectivity
- Azure Database for PostgreSQL
- Managed SSL certificates via Application Gateway
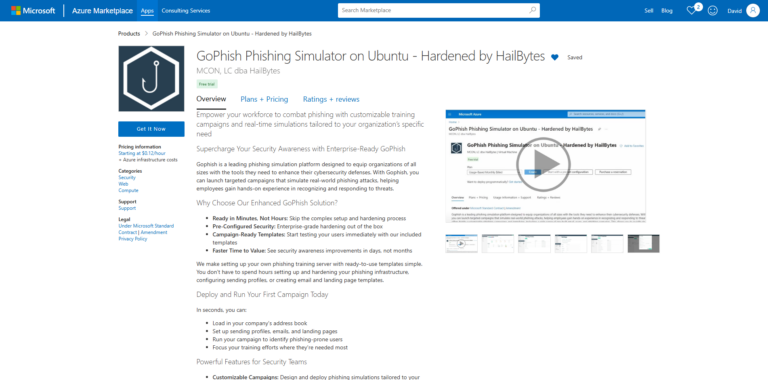
GoPhish Cloud on Azure Marketplace
Step 1: Access Azure Portal
Log into the Azure Portal and create a new Resource Group for your GoPhish deployment.
- Navigate to portal.azure.com
- Click "Resource groups" → "Create"
- Name it "rg-gophish-prod" in your preferred region
- Click "Review + Create" → "Create"
Step 2: Deploy ARM Template
Use our ARM template to deploy GoPhish infrastructure:
# Using Azure CLI
az deployment group create \
  --resource-group rg-gophish-prod \
  --template-uri https://hailbytes.com/templates/gophish-arm-template.json \
  --parameters vmSize=Standard_B2s adminUsername=azureuser

# Or click this button in the portal:
# Deploy to Azure button links to template
Alternatively, in the Azure Portal: go to "Create a resource" → "Template deployment" → "Build your own template" → paste the ARM template JSON.
Step 3: Configure Deployment Parameters
Fill in the required parameters for your deployment:
| Parameter | Value | Description |
|---|---|---|
vmName | vm-gophish-prod | Virtual machine name |
vmSize | Standard_B2s | 2 vCPUs, 4GB RAM |
adminUsername | azureuser | SSH admin username |
authenticationType | sshPublicKey | SSH key or password |
databaseSKU | B_Gen5_1 | PostgreSQL tier |
Step 4: Review and Create
Validate your configuration and deploy the resources.
- Review all parameters in the validation screen
- Check estimated costs in the summary
- Click "Create" to begin deployment
- Monitor deployment progress in "Deployments" tab
- Wait for "Deployment succeeded" status (3-5 minutes)
Step 5: Access Your GoPhish Dashboard
Once deployment completes, retrieve your connection information:
# Get public IP address
az vm show -d -g rg-gophish-prod -n vm-gophish-prod \
  --query publicIps -o tsv

# Get deployment outputs
az deployment group show \
  -g rg-gophish-prod \
  -n gophish-deployment \
  --query properties.outputs

# Outputs will include:
# - adminURL: https://:3333
# - publicURL: https://
# - sshCommand: ssh azureuser@
Navigate to the Admin URL and log in with default credentials (sent to your admin email).
Post-Deployment Configuration
Security Best Practices
- ✓ Change default admin password immediately
- ✓ Configure Azure Application Gateway for SSL/TLS
- ✓ Update NSG rules to restrict IP access
- ✓ Enable Azure Monitor for VM and database metrics
- ✓ Set up Azure Backup for VM and database
- ✓ Configure custom domain with Azure DNS
Cost Estimation
Monthly Azure costs for typical GoPhish deployment:
| Resource | Configuration | Est. Monthly Cost |
|---|---|---|
| VM Instance | Standard_B2s (2 vCPU, 4GB) | $36 |
| Azure Database PostgreSQL | B_Gen5_1 (1 vCore, 5GB) | $28 |
| Managed Disk | Premium SSD 128GB | $19 |
| Public IP | Static IPv4 | $3 |
| Bandwidth | ~100GB/month egress | $8 |
| Total | ~$94/month | |
Next Steps
Create Your First Campaign
Learn how to set up and launch your first phishing simulation campaign.
View Tutorial →Email Template Best Practices
Design effective phishing templates that test user awareness.
View Tutorial →Need Help?
If you encounter issues during deployment, our support team is here to help.
Contact SupportGet the Free GoPhish Cloud Getting Started Guide
A 7-part email series covering everything from your first deployment to advanced configuration and real-world workflows. One email per day, no spam.